SONIC, THE KEYBOARD
a short story about hardware reversing and arduinos
This story is documenting the making of an arduino-based USB-adapter to use up to 2 original Sega mega drive/genesis controllers on a computer acting as a keyboard.
Getting Started
With the start of the new year I wanted to spend my spare time venturing into new territories. The chosen target for January was "do something with arduinos" and I decided to start small and tackle a project that I had imagined years ago but deemed too difficult. I set out to make an arduino-based adapter where I could plug in my Sega mega drive/genesis-controller and use it on the computer to play emulated games.
Now, of course this already is a well solved problem with many github repositories readily available. All the hard work has already been done (and better) by someone else, so I estimated my chances of success pretty high. The aim of this project was to do it myself from scratch, learning the process without peeping at other solutions.
And like all the little adventures, this story starts at the beginning...
Step 1: The Reversing
The reversing went both harder and better than expected. Upon opening up one of the controllers I was puzzled why there even was a need for additional electronics. After all the 9 pins could be used for all 8 buttons and common ground. However, using some logic on the controller allowed for many things I didn't think of, like controllers with additional buttons or the 4-player adapter and features like port sensing.
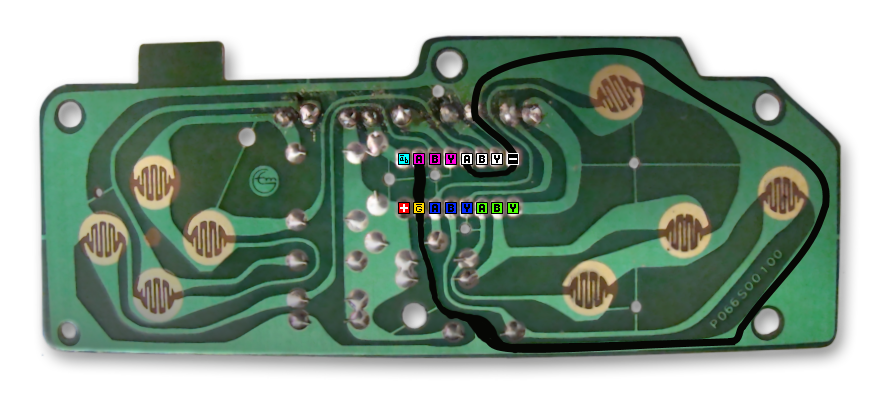
In the middle of a bunch of pull-up resistors I found a SN74HC157N. I searched the web for the datasheet and found everything I needed. Turns out it's a 4-channel line selector. You can easily understand how it works by looking at the function table included in the datasheet.
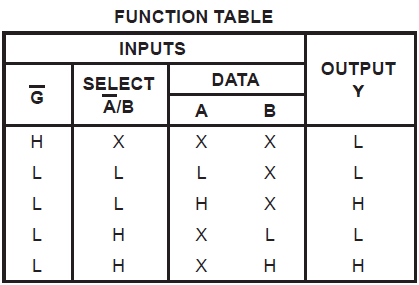
If you put G low (spoiler: it's hardwired to ground on the controller) you can select (by setting A/B-select to high or low) what input value (from either input A or B) will be on output Y.
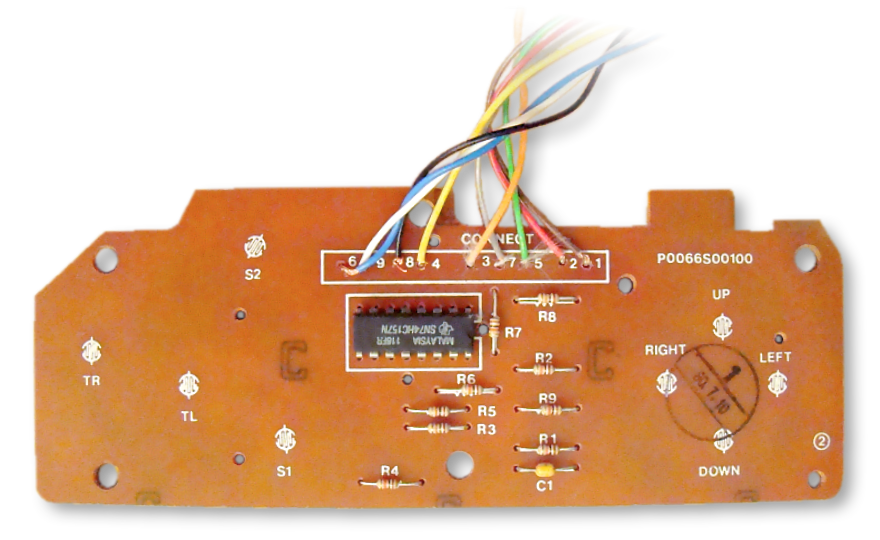
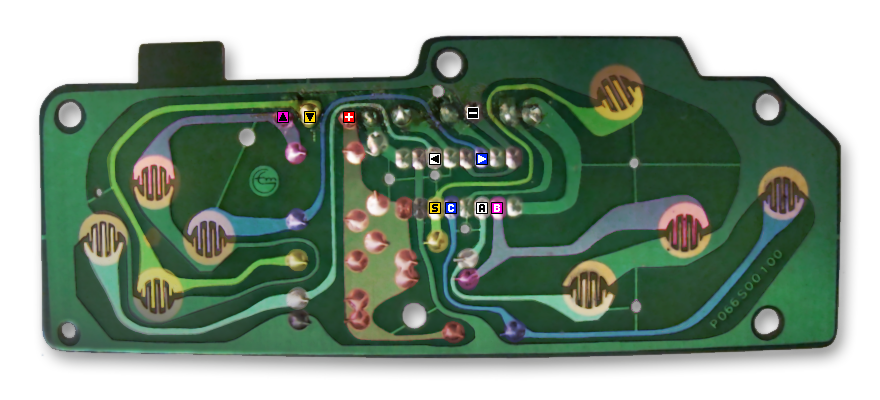
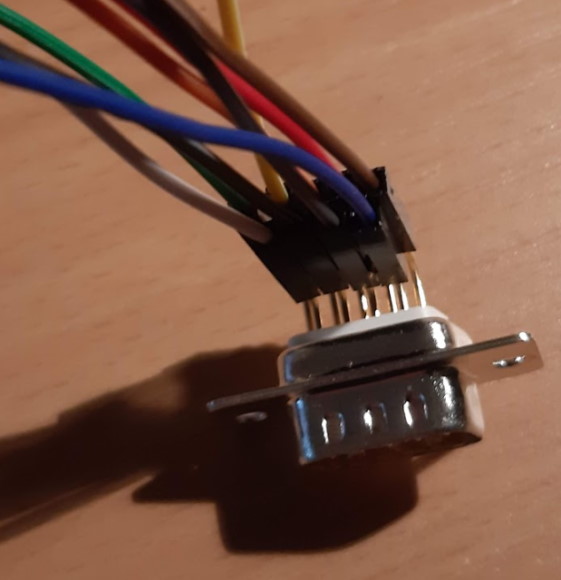
Next up was tracing the lines on the board. I did this by foolishly taking a photo of the pcb and marking the signal-paths with color in my image editor. It's a very stupid approach but it looks funky so here you go:
Now that I understood how the controller worked it was time to check and write down the pin-out of the D-SUB DE-9 connector the controllers use, assemble it back together and hook it up to the breadboard. I used the same colors the wires had inside the controller to make it easier.
And with all of that done it was time to start doing the arduino code.
Step 2: The Code
The first step was wiring up the +5V and GND pins of the controller and the up/down pins (as those are directly wired) and can be easily read using digitalRead().
With those 2 working I quickly added code to write some debug messages on the serial connection and started to switch the A/B-select-pin to read the other buttons as well.
To send events to the connected computer I used the arduino keyboard-library (using Keyboard.press() and Keyboard.release()). This required tracking the buttonstates to only send keyboard-events when a buttonstate actually changed.
While implementing the keyboard code I quickly found out that adding a keyboard-killswitch wasn't the worst idea. I learned the hard way that having an arduino send keystrokes to the computer you're trying to program on wasn't a very productive thing to have, especially when things don't work as intended. Using a switch between GND and a digital pin set to INPUT_PULLUP-mode made this very easy.
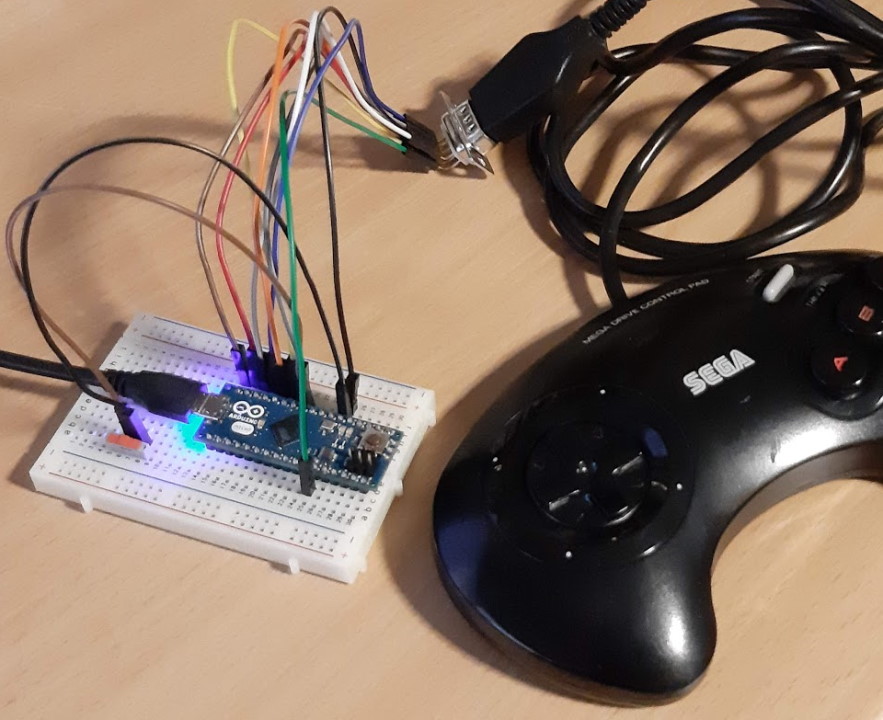
Everything worked fine, and I considered my prototype done. However, seeing all the empty pins on the arduino and remembering playing endless hours of RoadRash, Sonic and AlienStorm with my brother I decided to add support for another player.
Luckily, I had another connector in stock so I quickly wired it up and plugged in a second controller. I modified the code and after a little bit of copy-pasting and renaming I almost wanted to call it a day, when I accidentally un-plugged a controller and the thing went wild.
Oh no, what was going on? All the pins of the missing controller were now floating (being randomly read as high or low) and thus triggering random key presses on my computer. Remember our good friend, the kill-switch? Very handy! The floating pins were a problem I didn't think about at all as I was so focused on getting things connected that I failed to see the occurrence of someone just unplugging a controller.
So I went back to the drawing-board and looked at the circuit. How would the original console even notice that a controller is connected? Of course I could have looked it up, but I wanted to stick to the goal I set out to achieve. I must have missed some important information when looking at the controller.
I went through all my notes and wrote down all the additional things I noticed. I found 2 of the unused channel inputs to be wired to ground and thus would always be low if a controller was connected. But it could also be low if the controller wasn't plugged in so I thought this to be a dead end. I thought that there's no way this wasn't done on purpose so I kept thinking about it.
 And then it dawned on me. By using the input mode INPUT_PULLUP on the arduino I would still be reading the state of the buttons when connected, but get a high (pull-up, you know) if the pin was floating. So I restructured the code to implement this port-sensing and after testing decided to remove the keyboard-kill-switch as it was no longer required. (I actually put it behind a #define to enable it again if required)
I cleaned up the code (introduced debug-mode to leave out the serial-output of the release-version) and looked in awe at my wonderful breadboard-prototype.
If you like you can look at the full arduino code here.
Step 3: Finishing up
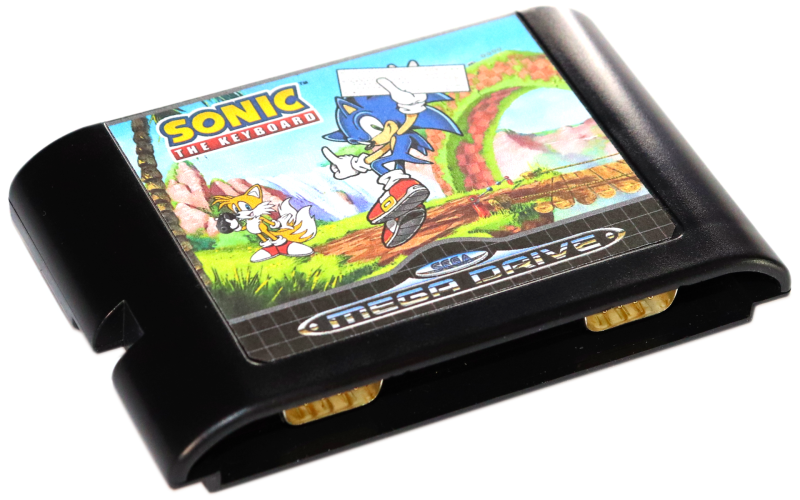
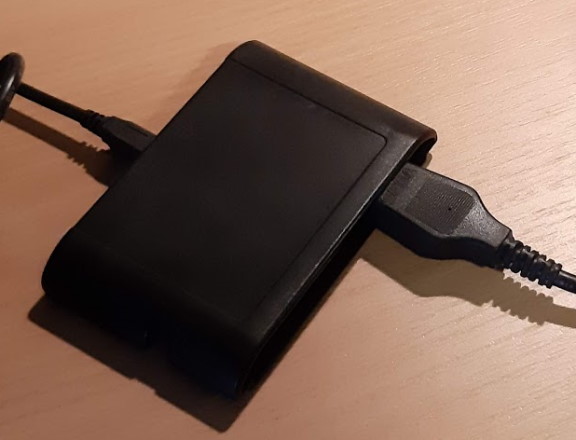
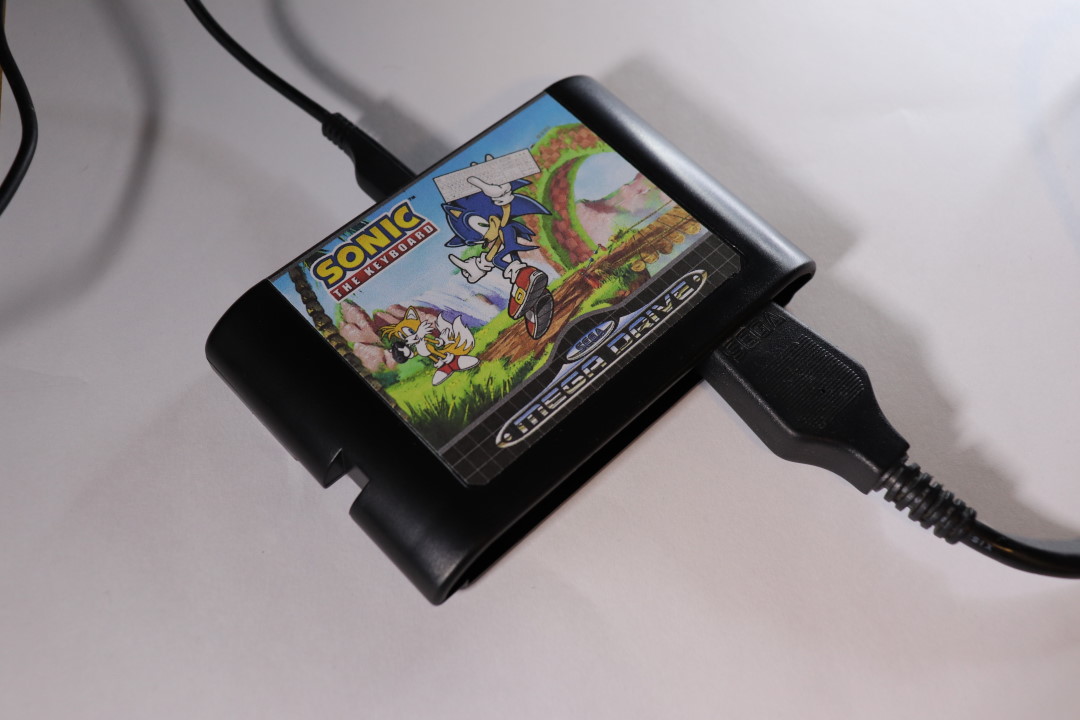
With everything built and tested on the breadboard it was time to transplant the project into a robust and nice looking enclosure. Luckily, I had a spare cartridge-shell that I ordered from dragonbox.de a while ago which made a perfect case for this project. It's a very close fit (as those carts are very slim) so I carefully scraped and cut away some plastic to make room for the ports and the arduino-board.
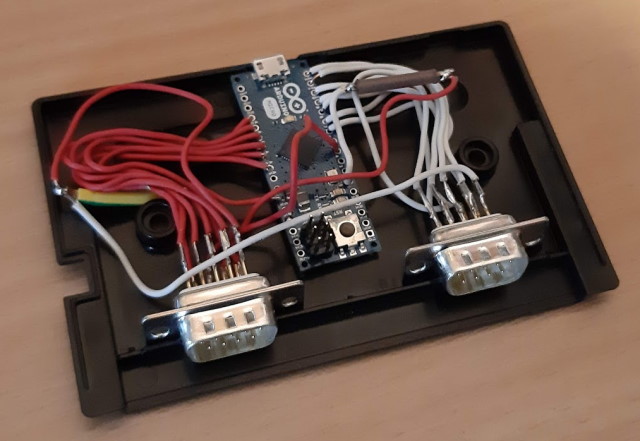
In hindsight, I should have gone for a PCB instead of free-wiring the ports. It worked well enough but looks very ugly on the inside. I hot-glued everything in place and carefully closed the shell. With everything assembled back together I was quite satisfied.
Step 4: The icing on the cake
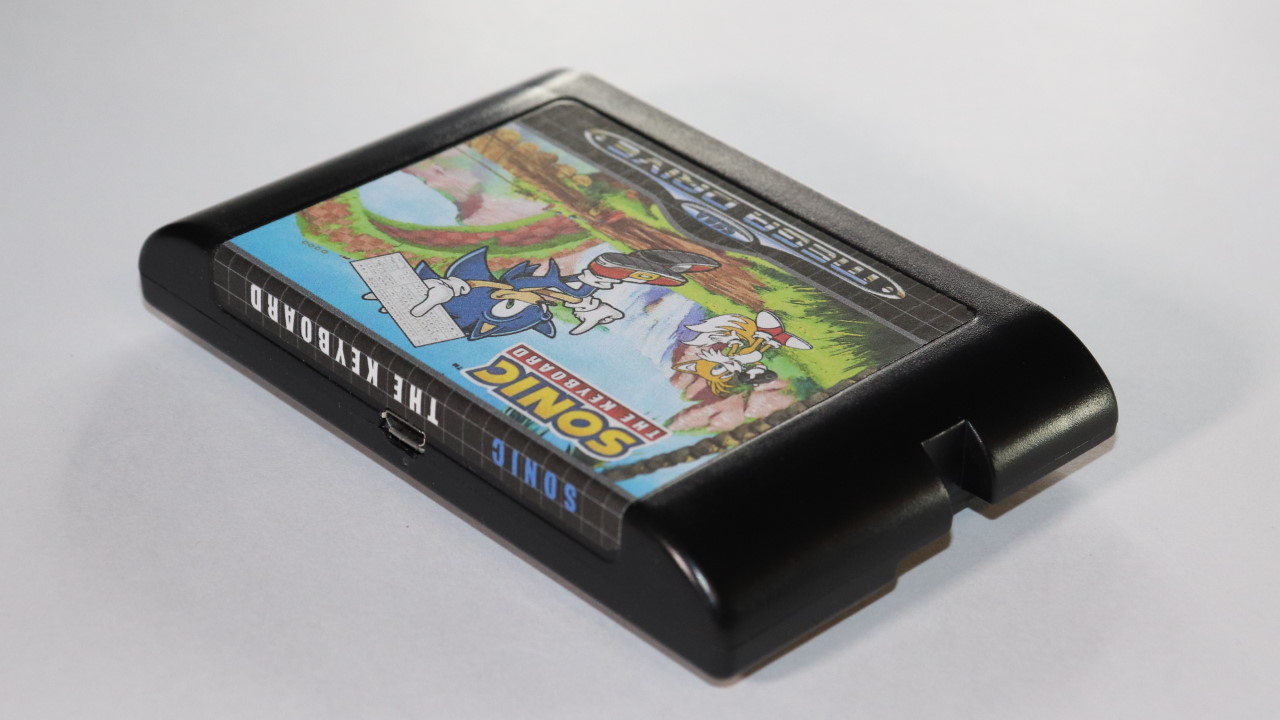
However the naked cartridge looked kinda bland without a label. So I started to search the web for some sonic-fan-art and other useful assets to create labels.
This template by neorame wasn't as useful as I hoped to be (due to using an online psd2svg-converter that always seemed to mess things up in a slightly different way) so I mostly recreated it in Inkscape. Adding in some stock-assets and fan-art and modifying them to my likings I soon had the label ready to be printed. It's not perfect but "good enough" for being a dummy-label.

To print the label I chose Avery Zweckform 4782 labels, mainly because they almost match the dimensions of the original labels and are easily printable (with both laser and inkjet printers). Using my inkjet printer did obviously result in grey-ish blacks and the finish isn't as glossy as a original cartridge label, but for a handmade cartridge it doesn't look too bad:


And that concludes the making of Sonic, the keyboard. Thanks for sticking around.
Hey there! It seems you made it to the end of the post.
If you enjoyed reading and are interested in more have a look at the index.
-->